
1
Before you start
Have these items ready before beginning the pairing process.
- Your Cloudpacx back-office login.
- Your Linkly Cloud username and password.
- Your payment terminal, switched on and connected to the internet.
Terminal menus can vary. Follow any setup instructions supplied with your terminal.
The terminal menu names in this guide may differ depending on your model and payment provider.
2
Set up Cloud communication on your terminal
If the terminal is already configured for Cloud communication, continue to Step 3.
- Tap Func, enter 7410, then select 2 Terminal Setup.
- Tap Begin and select 2 Cloud Comms.
-
Choose Ethernet or WiFi.
- Ethernet: continue once the connection setup finishes.
- WiFi: wait for the network scan, select your network, enter its password, and tap Next.
- When Setup complete appears, press CANCEL on the terminal keypad to return to the pairing screen.
3
Retrieve a pairing code
Use whichever method is available on your terminal.
- Open Custom Payments → Linkly Cloud Connect and follow the prompts to display a pairing code.
- Alternatively, tap Func, enter 8880, and press ENTER.
Keep the pairing code private. You will need it in Cloudpacx in the next steps.
Do not share the code in screenshots, tickets, chat messages, or email.
4
Open Linkly settings in Cloudpacx
Navigate to the EFTPOS configuration area in the Cloudpacx back office.
- Sign in to the Cloudpacx back office.
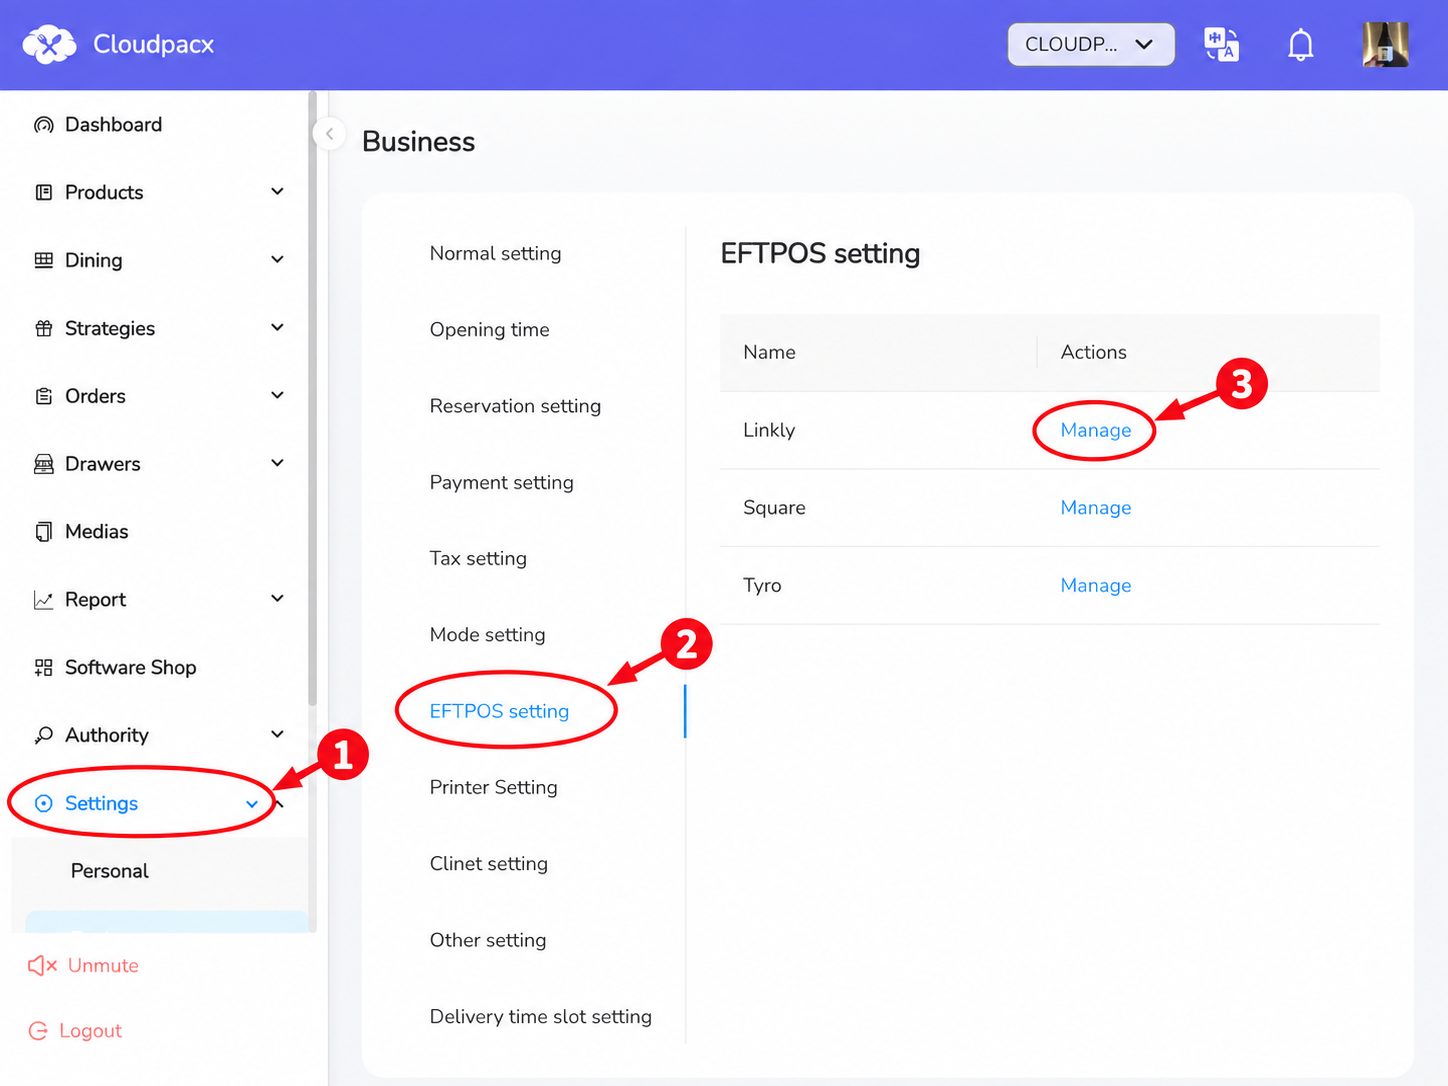
- From the left-hand menu, select Settings → Business.
- Open EFTPOS setting.
- Find Linkly and click Manage.
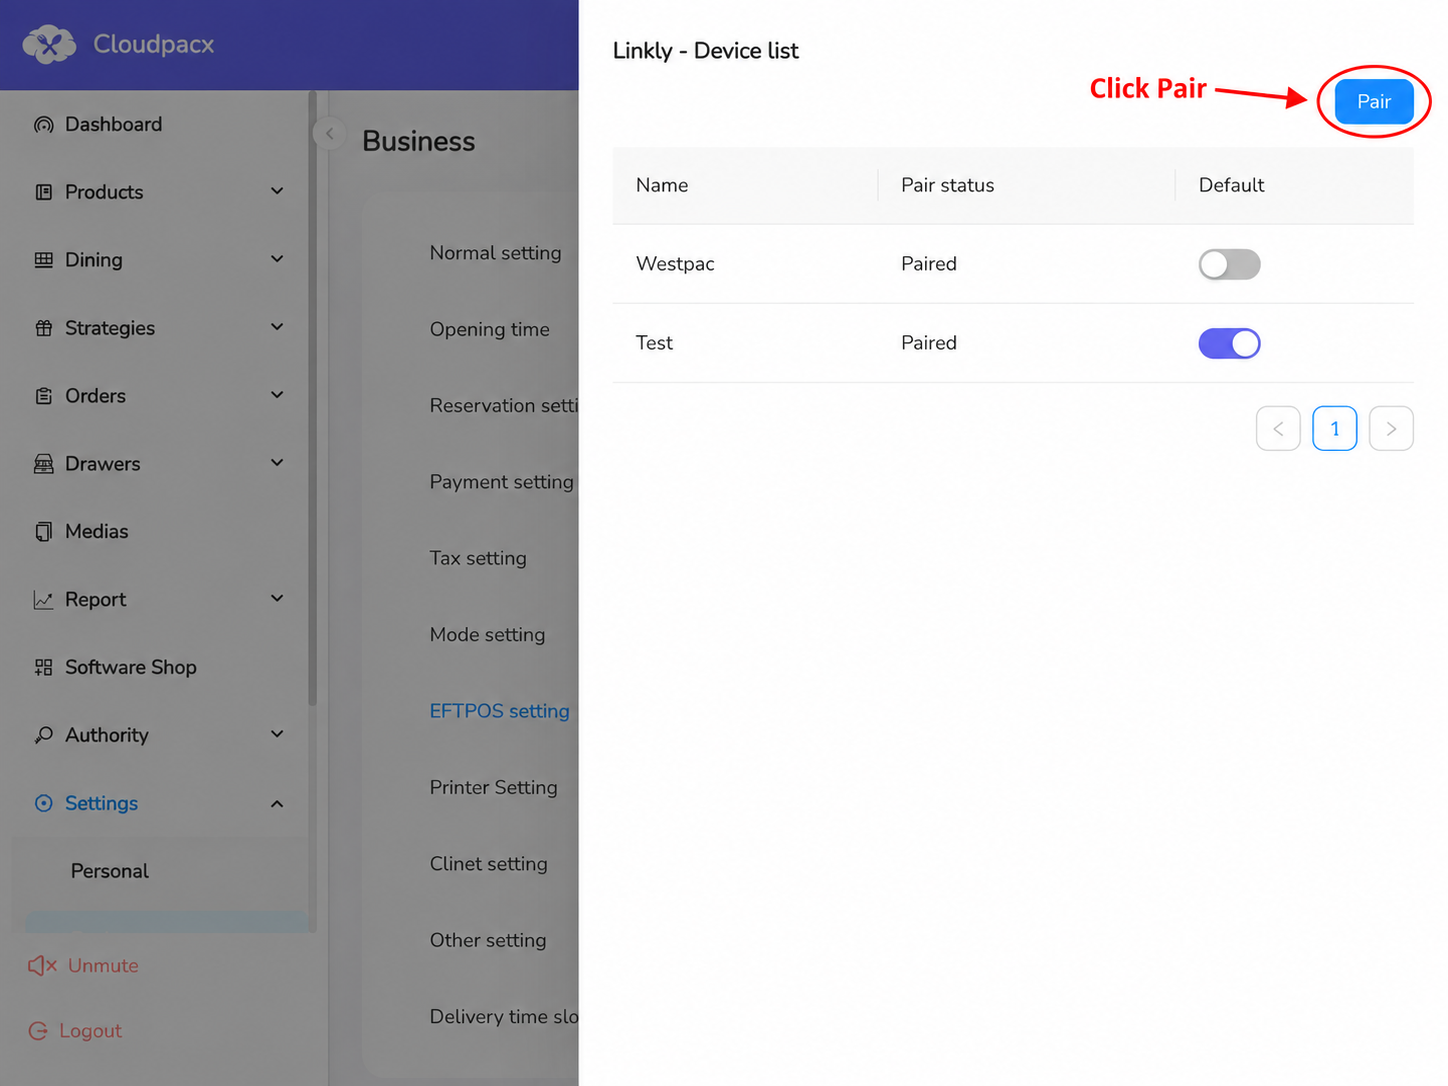
- In Linkly - Device list, click Pair.
5
Enter your pairing details
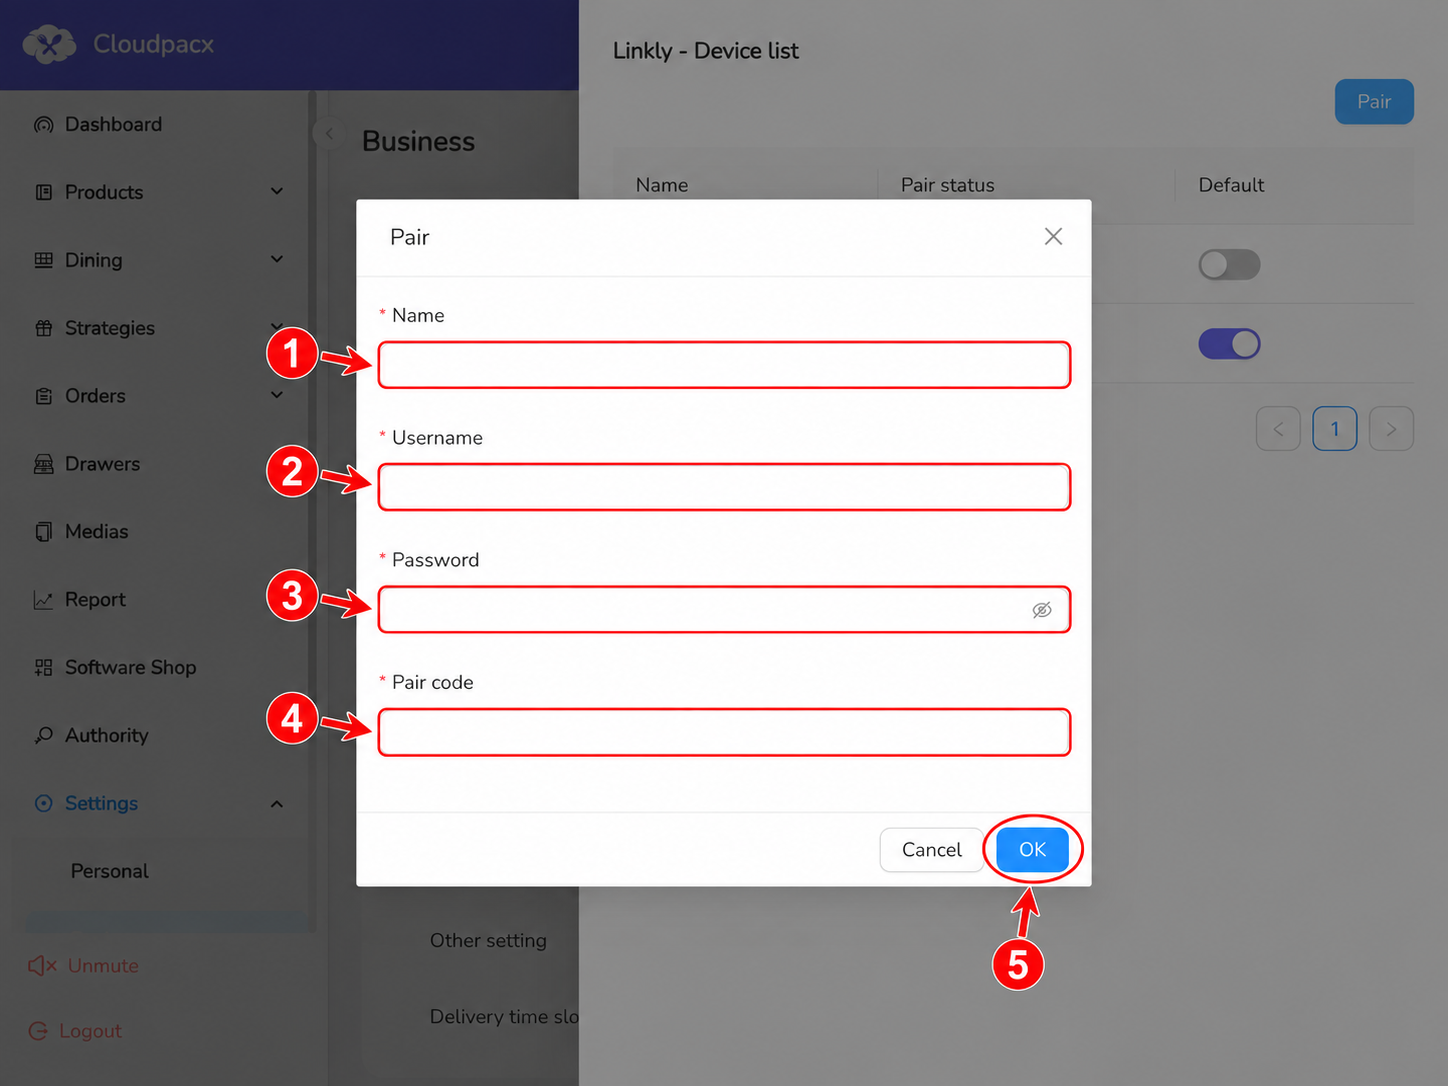
Complete all required fields in the Pair form.
| Field | What to enter |
|---|---|
| Name | A recognisable name for the terminal, such as Front Counter. |
| Username | Your Linkly Cloud username. |
| Password | Your Linkly Cloud password. |
| Pair code | The pairing code currently displayed on your payment terminal. |
Check the details, then click OK to submit the pairing request.
Security: Never include a real Linkly password or active pairing code in screenshots, support tickets, or documentation.
6
Check the pairing status
Confirm that Cloudpacx can see the terminal as paired.
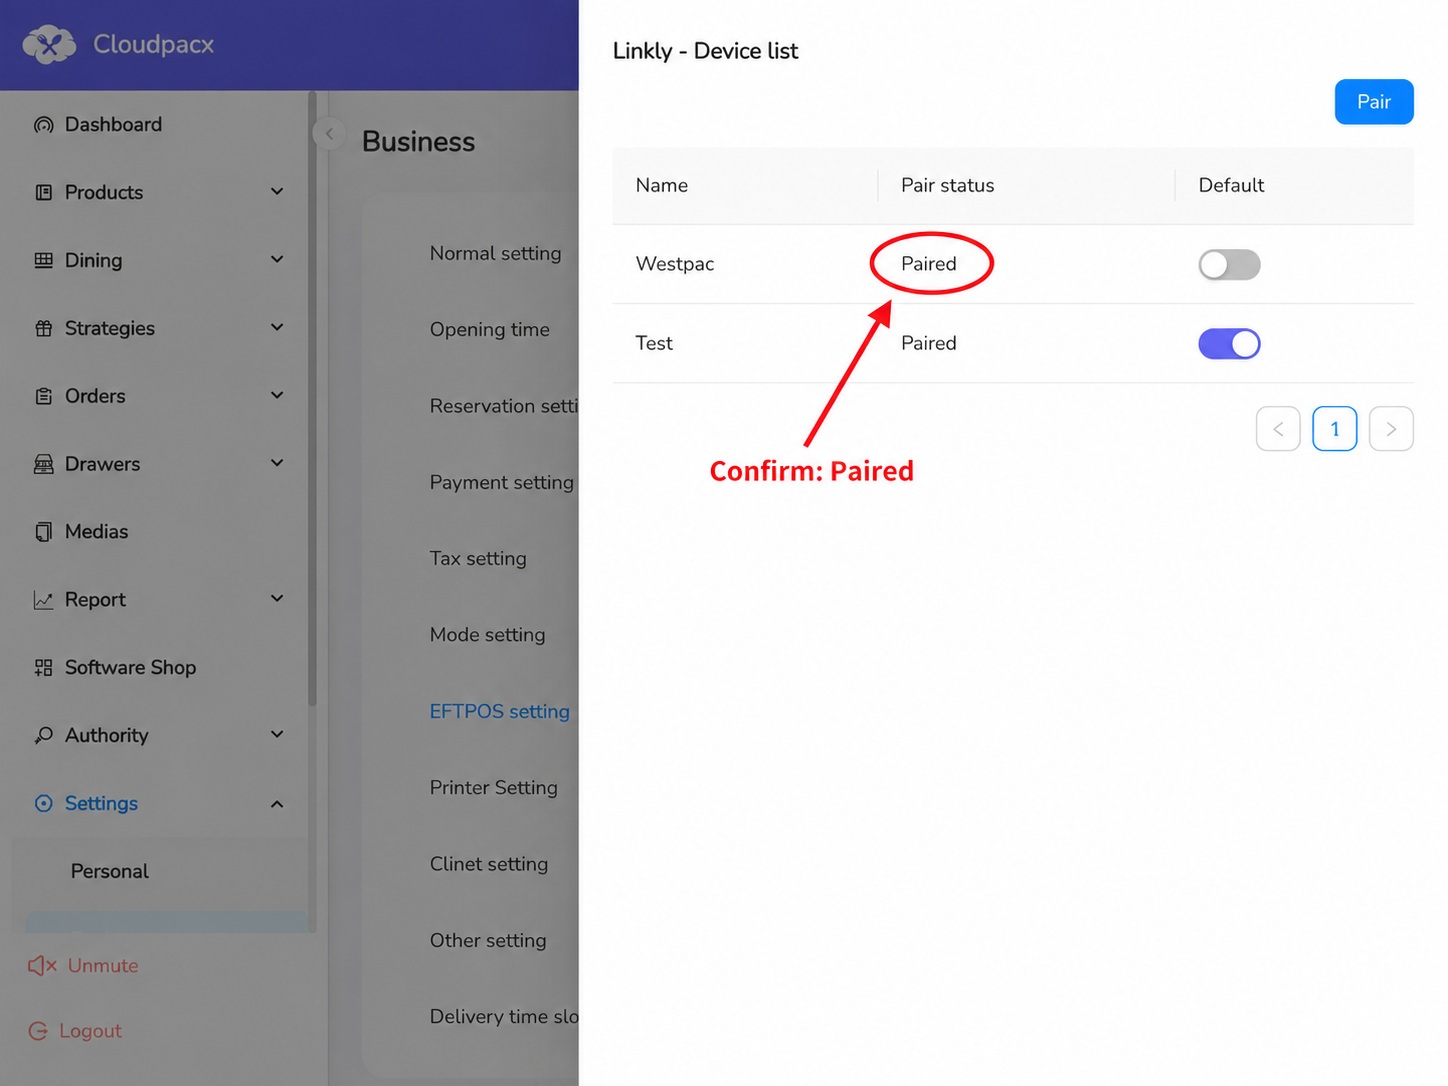
- Return to Linkly - Device list.
- Locate the terminal you just added.
- Confirm that its Pair status displays Paired.
Final verification: Before using the terminal for customer payments, follow your payment provider's approved procedure
to confirm that a payment initiated from the POS reaches the correct terminal and that the result returns to the POS.
Need help?
If pairing does not complete, check the following:
- Confirm that the terminal is connected to the internet.
- Recheck the Linkly Cloud username, password, and pairing code.
- If the terminal menus differ from this guide, follow the instructions supplied by your payment provider.
- Contact [email protected] if you still need assistance. Include the terminal model and any error message, but do not send your password or pairing code.