
Open Client setting
- Sign in to the Cloudpacx back office and confirm the business selected at the top.
- Go to Settings → Business.
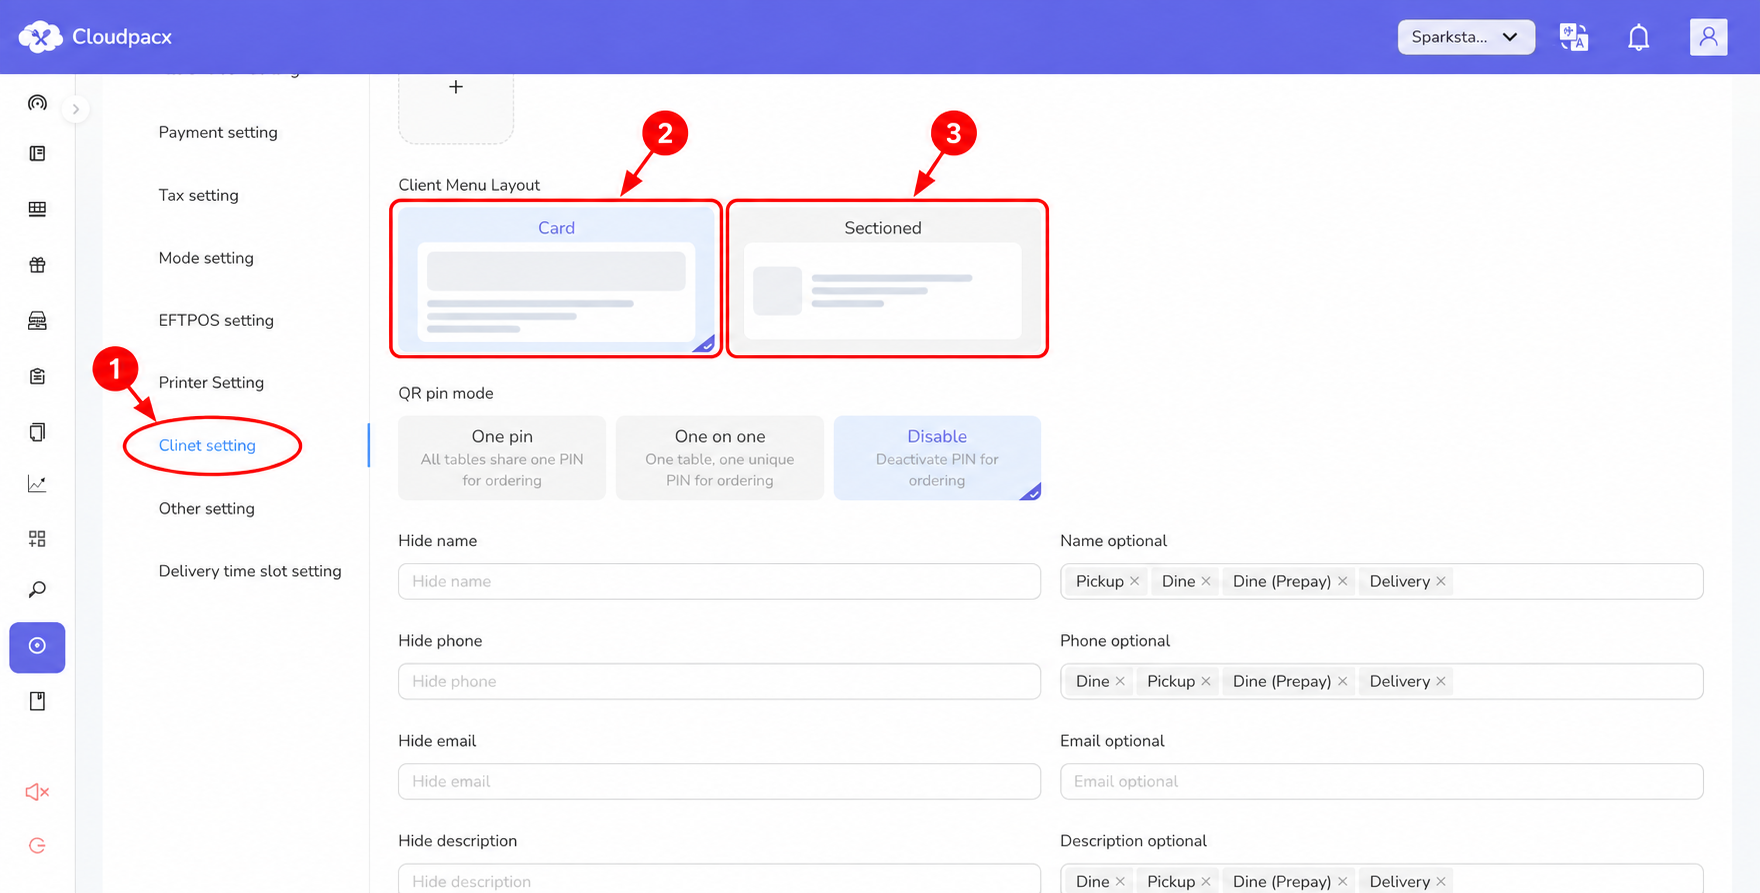
- Select Client setting. In the current interface, this tab is labelled Clinet setting.
- Find Client Menu Layout near the top, below Banner.
The two layout choices are Card and Sectioned. They are options within the same client-menu setting.
Compare the two layouts
| Layout | What customers see |
|---|---|
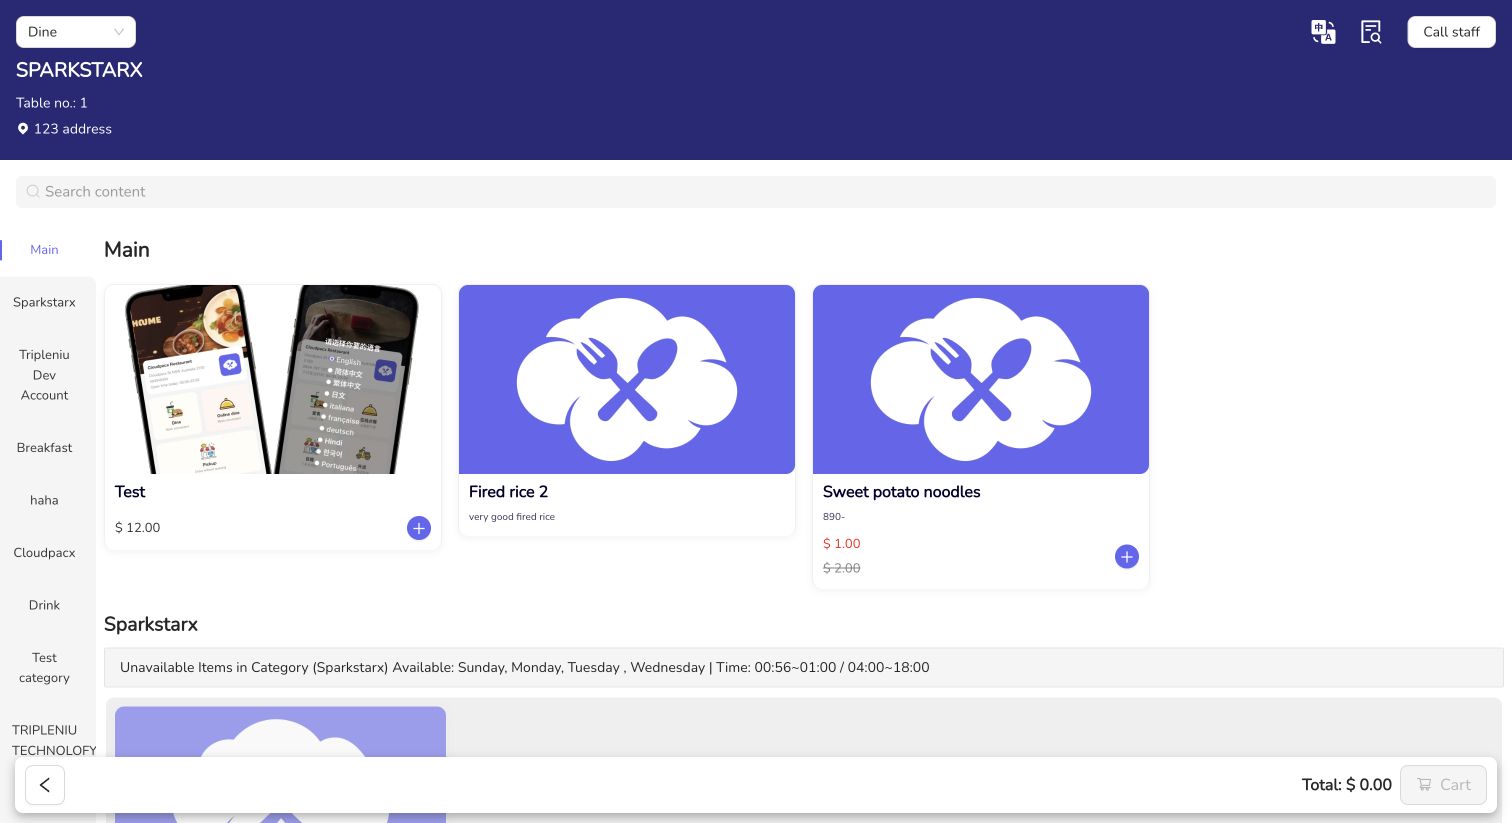
| Card | Larger product images above the name and price. Each item takes more vertical space, making the images more prominent. |
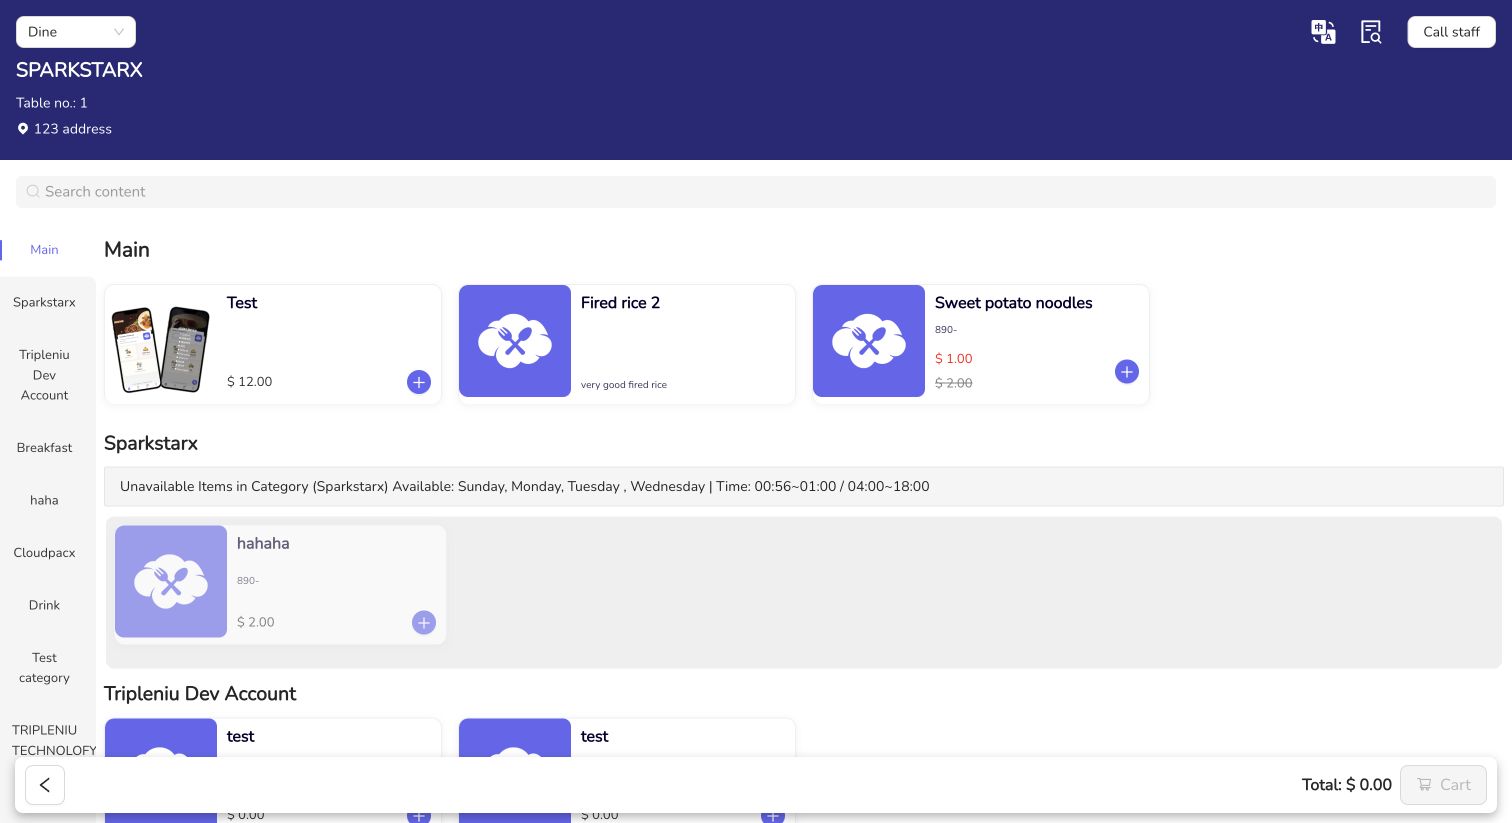
| Sectioned | Smaller product images to the left of the name and price. The shorter item rows let customers see more products in the same screen area. |
Compare the actual client screenshots below. Both show the same table, products and browser size; only Client Menu Layout was changed. The screenshots show the desktop view, and the number of items per row can vary with screen width.
Card — larger images above the text
Sectioned — compact images beside the text
Where to choose the layout
Choose a layout and save
- Select the Card or Sectioned preview tile.
- Check the selected styling and tick on the tile before saving.
- Scroll to the bottom of Client setting, past the customer-detail fields and Welcome Information Modal section.
- Select the blue Save button.
Check the saved layout
- Reopen Business → Client setting and confirm the intended tile remains selected.
- Open or refresh the customer-facing menu for the same business.
- Review several items with different image sizes and name lengths. Check both the image placement and readability.
To switch back, return to Client Menu Layout, choose the other tile and save again.
Common questions
The client still shows the previous layout
First reopen the setting and check which tile is saved. Confirm you are viewing the same business’s client menu, then refresh that menu. If the saved selection and client display still differ, contact support with the client URL and the selected layout.
Where is Save?
Save is at the very bottom of Client setting, below the Welcome Information Modal entries.