
Open the category editor
- Sign in to the Cloudpacx back office and check that the correct business is selected.
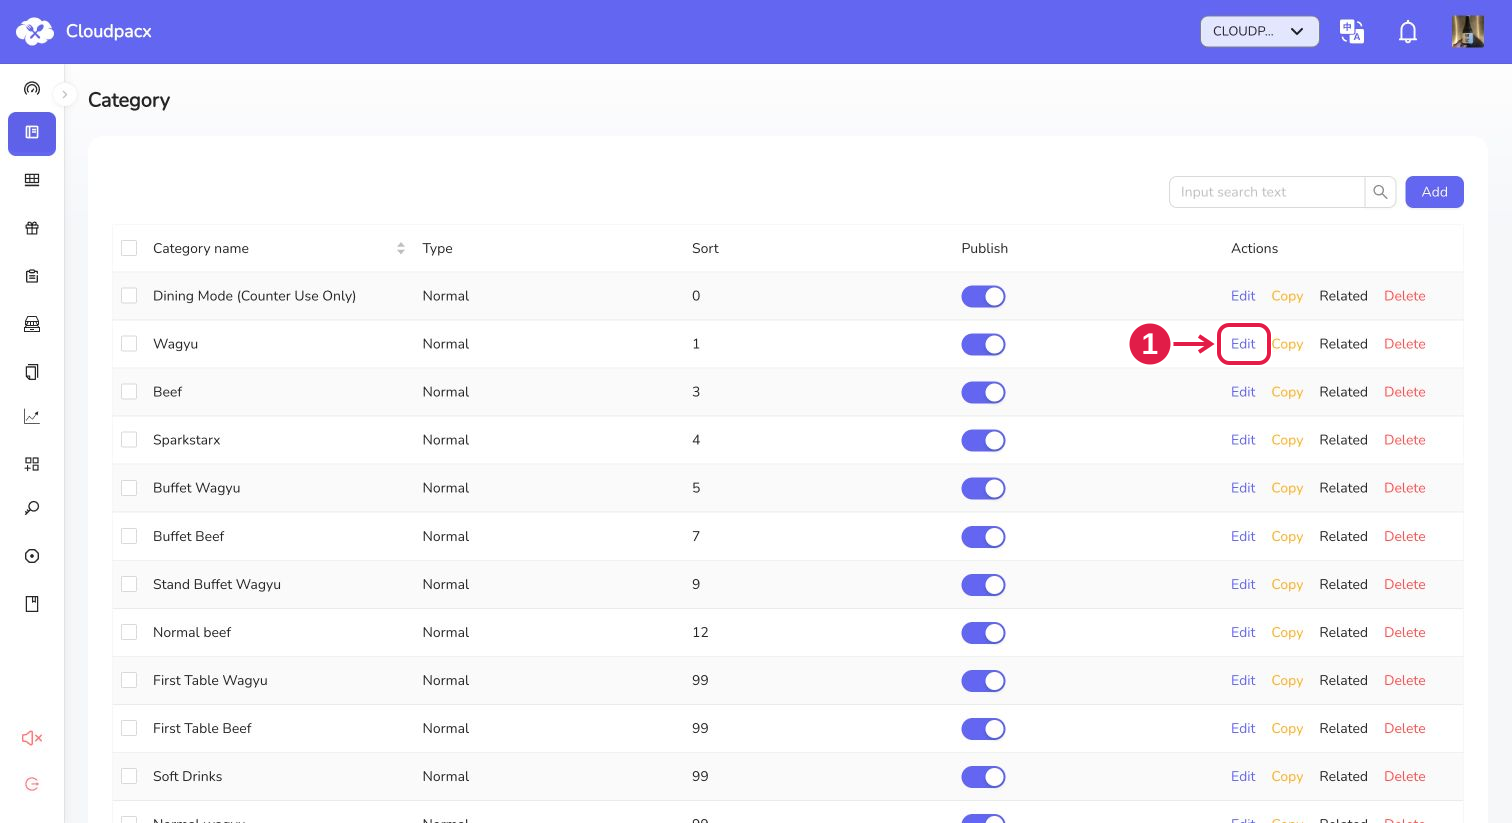
- Open Categories → Category List and find the category you want to schedule.
- Click its Edit action and open the Normal tab.
- Check the category name and the Publish switch. A schedule alone does not make an unpublished category visible.
For example, edit the Lunch category to schedule its availability, rather than editing an individual product inside it.
Enable scheduling and choose a mode
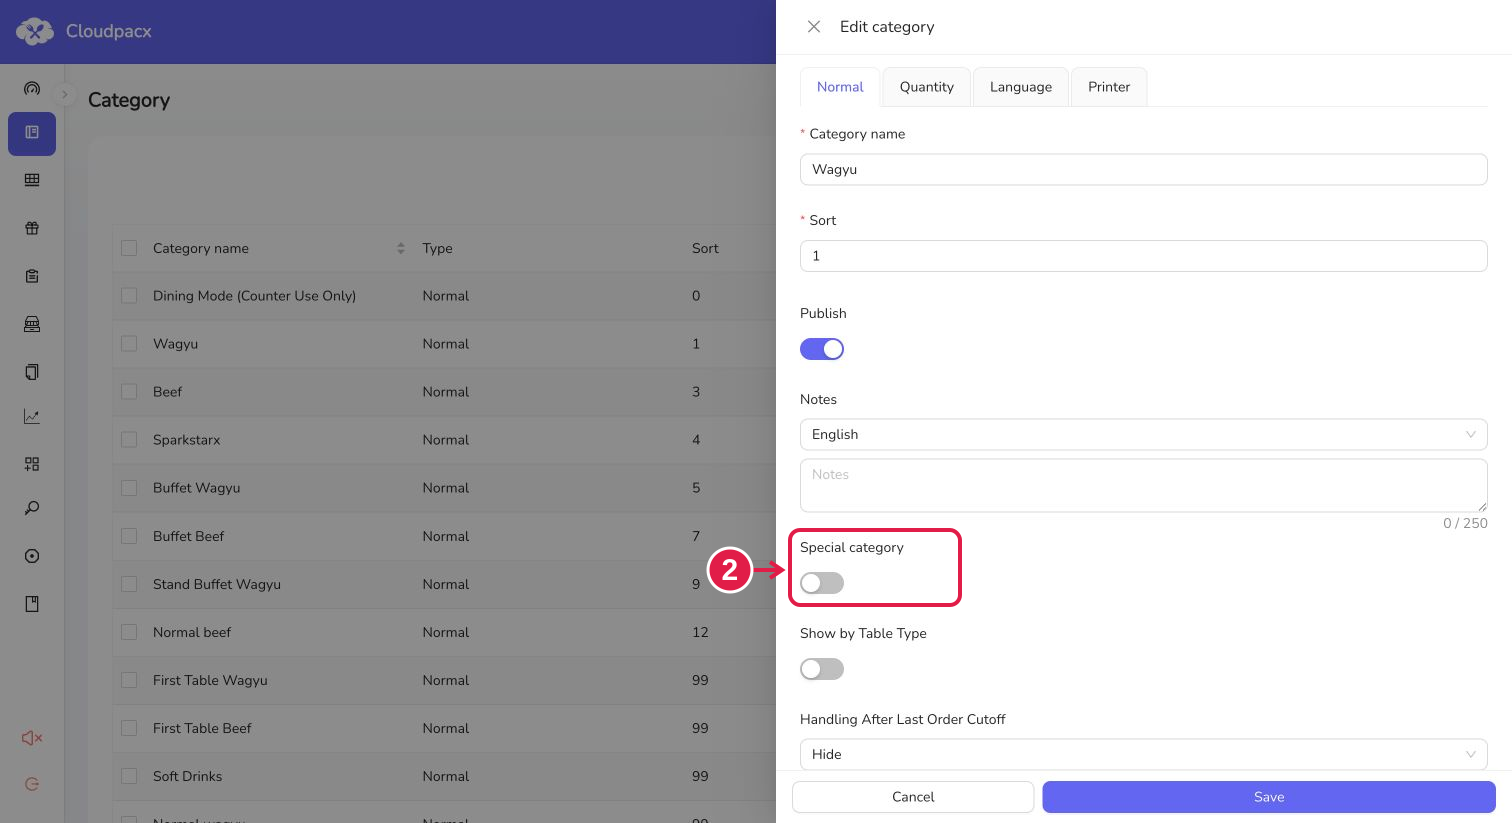
Turn on Special category. The form reveals Mode, Time and Special Category Action.
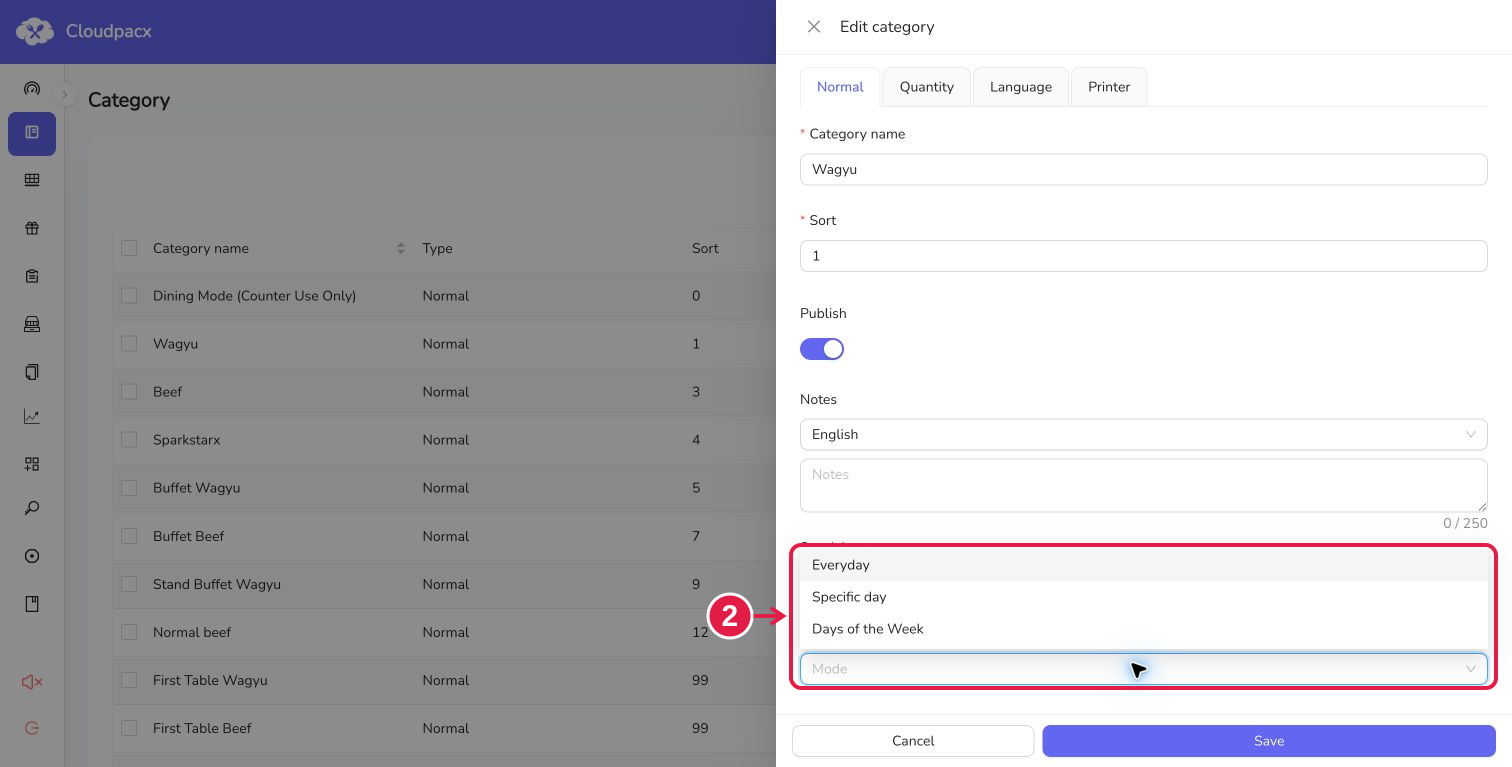
| Mode | What to set | Example use |
|---|---|---|
| Everyday | Repeat daily; set the time windows under Time. | A daily breakfast or lunch menu. |
| Specific day | Select a start and end date under Value, then set Time. | A promotional menu for a date range. |
| Days of the Week | Select one or more weekdays under Value, then set Time. | Weekday lunches or a weekend menu. |
Mode determines the applicable dates; Time determines the hours within those dates. Selecting weekdays or a date range does not replace the time-window settings.
Add display time windows
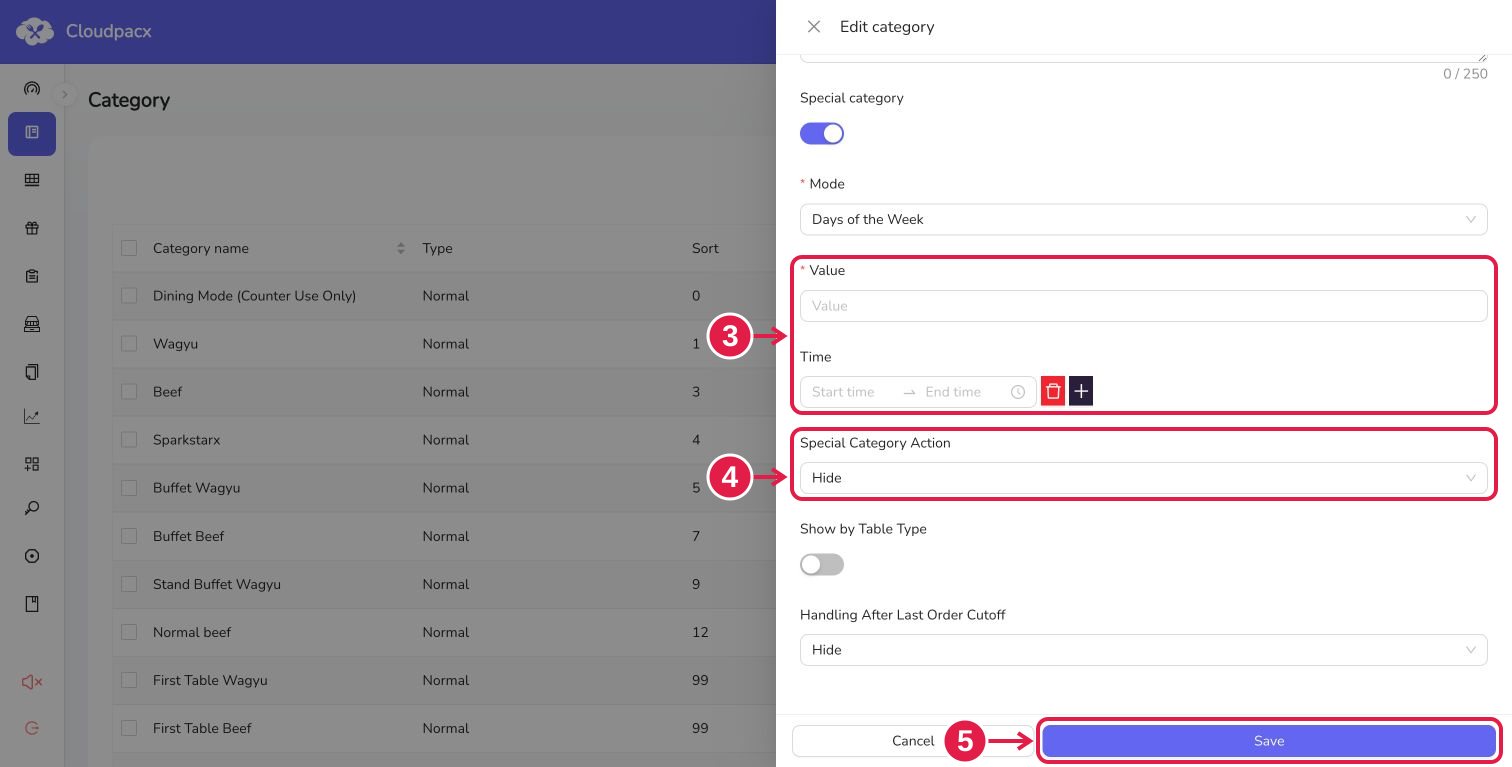
- Under Time, click Add time.
- Select a start and end time in HH:mm format, such as 11:00 → 14:00.
- To offer the same category at dinner, use the plus icon beside the first row and add another window, such as 17:00 → 21:00.
- Remove unwanted windows with the delete icon beside the row. Keep at least one complete time window while this feature is enabled.
Separate windows let you pause availability between lunch and dinner. Double-check that each start and end time matches the intended service hours.
Choose the outside-schedule action
Use Special Category Action to choose what happens when the scheduling conditions are not met:
- Hide: hide the category. Choose this when the category should appear only during its scheduled times.
- Unselectable: make it unavailable for selection. Use this if you want to retain its display while preventing selection, then check the presentation on the actual client.
Choose Days of the Week, select Monday through Friday under Value, add 11:00 → 14:00 under Time, and select Hide for Special Category Action. These are example hours; use your store’s actual service times.
Save and check the client
- Review the category, Publish, Mode, Value, all time windows and Special Category Action.
- Click Save at the bottom of the editor and wait for the success message. Cancel discards unsaved changes.
- Reopen Edit for the category and confirm that the dates and times were retained.
- Refresh the actual ordering client and check the category both inside and outside the scheduled hours.
If the category is still missing, check its published status, available products and other restrictions, including Show by Table Type or the last-order cutoff. Scheduling does not override those conditions.
Common questions
How do I remove the time restriction?
Turn off Special category and click Save. Published status and other enabled rules still apply.
Can a category have two time windows every day?
Yes. Choose Everyday and add two start/end pairs under Time.
Why is a time required after I select weekdays?
Weekdays and time windows are separate settings. Add at least one window and complete both its start and end time.
Why does the actual display time differ from what I expected?
Check the dates, weekdays and hours first, then review the business time zone. Confirm the result on the actual client rather than relying only on the editor values.